No products selected.

- Car Rental System
- Survey Manager
- Maps Inserter for Google Maps
- Advanced Form to Email PHP
- Advanced Form to Email ASP
- Posts Carousel
- Comments Inserter Widget for Facebook
- Mobile Optimize
- Photoshow
- Smart List
- Light Date Picker Calendar
- Touch OnOff
- Touch Button
- Light Edit
- Advanced Form to Excel PHP
- Text Tools
- Advanced Database Relational List
Car Rental Software - Installation
 Product Info
 Demo / Video / Faq
 Instant Download
The page explains the installation steps for the CP Rentacar System, car rental software.
INSTALLATION
There are two main ways to start the installation, using a Dreamweaver extension or manually copying the files to your website.
In any case, follow these steps:
- If you aren't using Dreamweaver then the first step is to unzip the downloaded file keeping the folder structure. If you are using Dreamweaver then access to the menu Commands >> Create CP Rentacar System and the files will be generated into your website.
- Upload all the files to your online webserver keeping the folder structure.
- Set writing permissions (777) into the following folders:
- "/uploads": This folder is used to store the car images. Set permissions also to the "/uploads/thumbnail" subfolder.
- "/UserFiles": This folder is used to upload the content images. Set permissions also to the "/UserFiles/Image" subfolder.
- "/mmanager/kernel/config/config.inc.php": This file needs writing permissions only for the installation process.
- Create an empty MySQL database in your webserver. Create a new user for that database and assign the user all the privileges over that database.
- Open your webbrowser and type load the "installation" file into your website. For example, if your website domain name is www.sample-website.com and you placed the rentacar files into the root folder of that website, then load this URL: http://www.sample-website.com/
- Follow the instructions on that wizard and the installation will be ready in a few steps. All you need to know are the access details for the MySQL database that you created in the previous step.
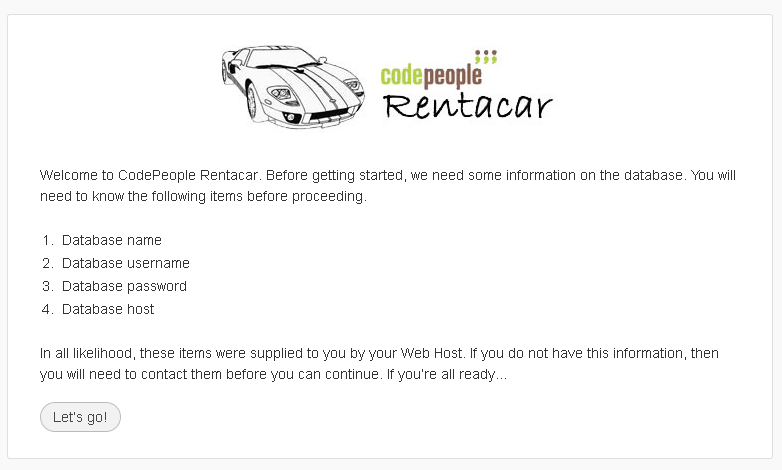
The first page of the wizard is just a welcome screen that remembers which data you need to know before starting the process (basically the MySQL connection details):
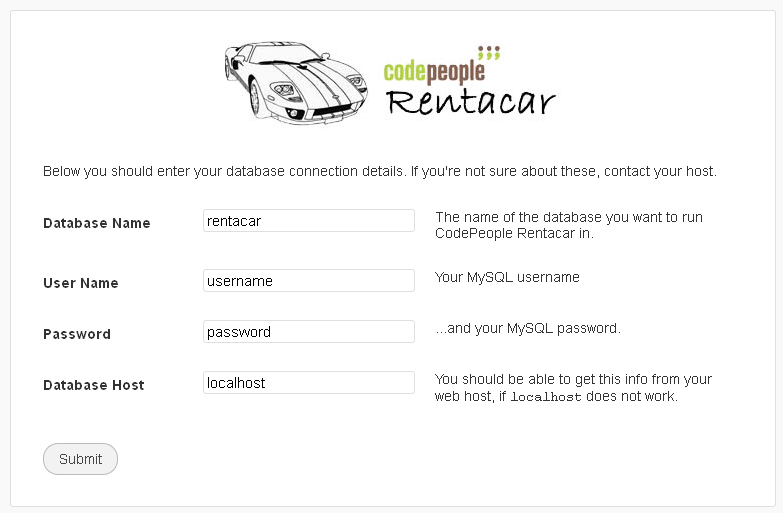
The second page is just for entering the MySQL connection data. Each page contains hints and instructions about the data requested:
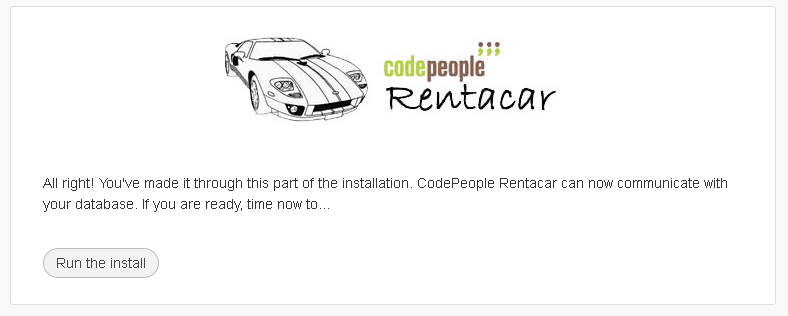
The third page is a confirmation page that checks if the MySQL database connection was correctly made. If there is some problem contacting the database you will see the details and instructions into that page. If all worked fine you will see a page like this one:
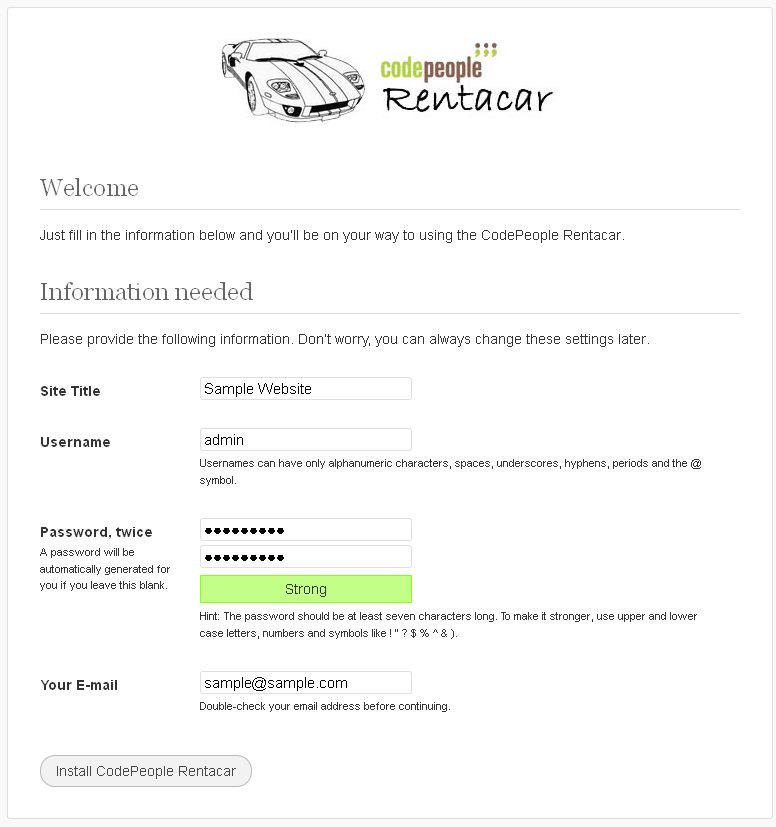
The fourth page asks you some basic information: the website title, the main username that you will use to access the admin area, a password for that username and your email address. This information will be saved only into your local database and can be edited later from the admin area:
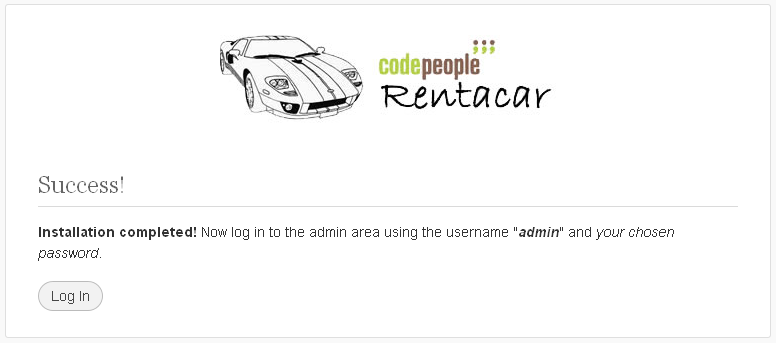
And finally you have installed the rentacar system. The installer with try to automatically create the config file, if the server allows doing this, you will get a page like this one inviting you to log in to the administration area:
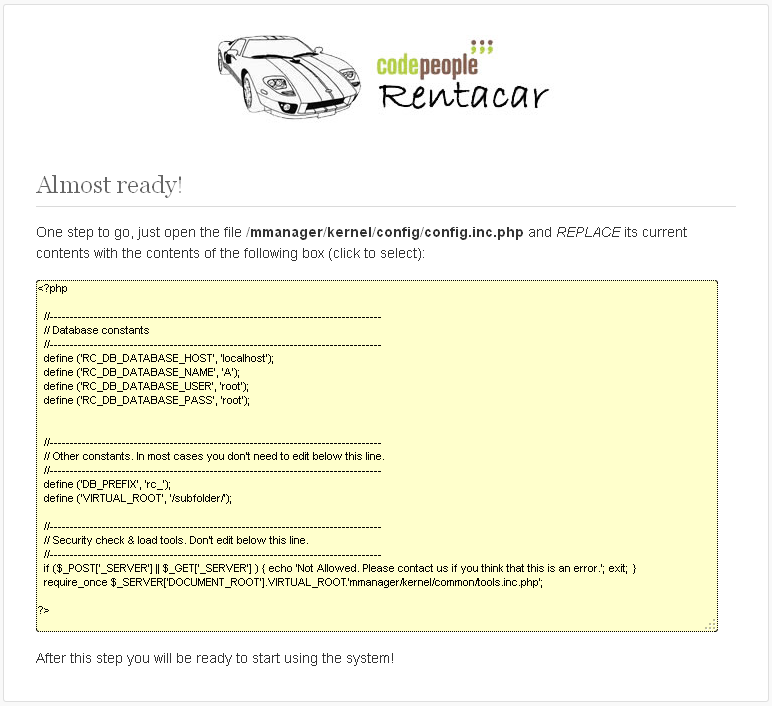
To be able to automatically create the config file, the folder "mmanager/kernel/config/config.inc.php" must have writing permissions. If the permissions don't allow overwriting that file then you will get a page like this one giving you instructions for replacing that file manually:
After completed the installation process you can optionally delete the "installer" folder. Keeping this folder isn't a security breach, but anyway that folder is no longer needed.
Read more about the car rental software at the main page.
OPTIONAL
We can offer you an assited installation for just us$35. You can request it from our contact us form. With the assisted installation we will install and configure the car rental system into your website. In order to complete the assisted installation you should provide access to create a MySQL database (usually the website control panel) and FTP access to upload the files.