No products selected.

- Car Rental System
- Survey Manager
- Maps Inserter for Google Maps
- Advanced Form to Email PHP
- Advanced Form to Email ASP
- Posts Carousel
- Comments Inserter Widget for Facebook
- Mobile Optimize
- Photoshow
- Smart List
- Light Date Picker Calendar
- Touch OnOff
- Touch Button
- Light Edit
- Advanced Form to Excel PHP
- Text Tools
- Advanced Database Relational List
 Product Info
 Demo / Video / Faq
 Instant Download

Paypal: You will return from Paypal to a direct download page. A copy of your personal donwload link will be sent to the email address used for payment.
Be sure to check also your spam/bulk mail folder.
Survey Manager
Customer feedback is essential to any business or service. Knowing the opinion of your users and their preferences can make all the difference between a successful business and a fiasco. In web projects it is exactly the same, knowing what users have to say is critical.
There are many techniques to obtain information from users, but one of the most extensive and effective ones is the survey. Through surveys we can analyze a whole set of topics you need information about to achieve a quality service.
To facilitate the creation, publishing and analysis of survey responses we have developed a survey management system, Survey Manager. Survey Manager is a web application with very basic requirements allowing its publication on the majority of web servers.
FEATURES
With Survey Manager you can:
- Create a new poll
- Define the list of questions in the questionnaire
- Enter the possible answers to each question
- Select among a set of visual themes, the way to display surveys
- Analyze survey responses, with possibility to sort or group for more accurate analysis
- Make backups of surveys and responses, and more...
Demo
REQUIREMENTS
Survey Manager is a web application and must be posted on a web server of your choice but with support for PHP Script version 5 or higher.
The storage of surveys and their responses is performed in a SQLite database, thus SQLite is also required.
INSTALLATION
Installation
To install "Survey Manager" on your web server just follow the steps below:
1. Publish the “survey” folder on the public folder of your web server.
2. Make sure the “upload” directory has writing permissions. The upload folder will be storing all the images you wish to publish in a survey.
3. Open the following webpage in your browser http://www.yourdomain.com/survey/installation/install.php
Install.php page allows you to set a password to protect access to Survey Manager (Figure 1) and enter the email address where you wish to receive a notification each time a survey is answered. After setting the password and email, press the OK button. Survey Manager is now ready for use.
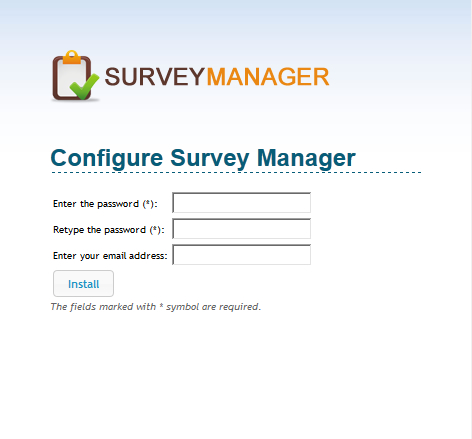
Figure 1. Installation screen.
Note: We recommend that once you defined a password, you delete the "installation" folder to prevent third parties from changing the password to the system.Use
Survey Manager is already installed on the web server and ready to start creating and publishing surveys. To quickly learn how to use "Survey Manager", we will give you a step by step explanation of how to create a survey, enter questions and answer options, describing the different screens that are used in the process.
After creating a survey, publish it on a web page and analyze the responses to a particular survey.Creating a survey
To create a new survey, you first need to log in, using the password defined during the installation procress, by visiting this page:http://www.yourdomain.com/survey/login.php (Figure 2)
Note: Replace www.yourdomain.com for your real domain name.
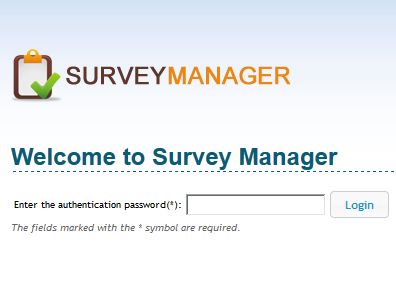
Figure 2. Login screen
This page is very simple - it just has a text box to enter the password and the "Log in" button (if you enter the password incorrectly it will show an error message).
Enter the correct password and press the "Log in" button. A new page will open up, (Figure 3), with a list of surveys (if any were previously entered) or a text stating that you haven’t yet published any surveys. This page has several important areas:
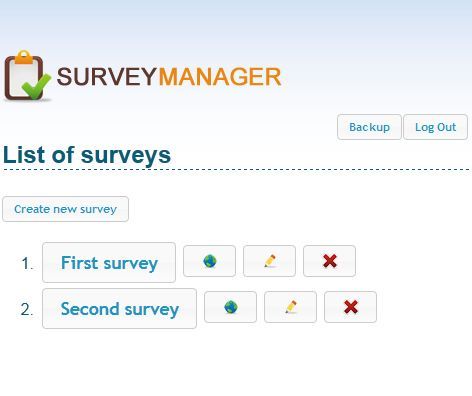
Figure 3. List of surveys
At the top right of the screen there is a button to backup the system (Performing a backup of the system is discussed later) and one for log out of the survey management system.
Nearby is the button "Create new survey". In the central area of the page, a list of already created surveys is shown with a set of actions, such as: Publish the survey, Edit text description of the survey or Delete the survey. If you press on the name of the survey, you will see the questions that make part of it, but this is a step that we will discuss later. For now we are creating our first survey.
Press "Create a new survey". This action displays a new screen (Figure 4) where you can enter the description of the new survey. The description of the survey is not going to be published, it is simply meant to allow you to differentiate one survey from another. Enter the description of the survey and click "Create" under the text editor.
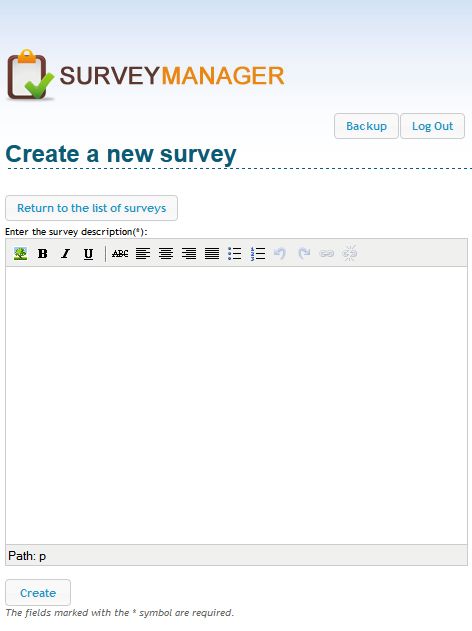
Figure 4. Create survey screen.
Our first survey was created successfully but does not yet have any questions.
At this time the system will lead you to a new screen where you can start creating the questions associated with the survey, or return to the list of surveys (Figure 5).

Figure 5. List of questions empty.
Press "Create a new question": this action displays a form for the creation of our first question. (Figure 6)
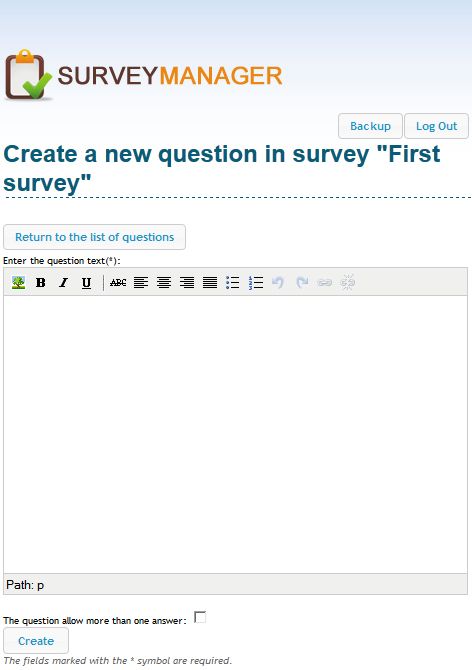
Figure 6. Create a new question
The form for the creation of survey questions has two important points: first, the question text is displayed to the website’s end users, so be careful with the text you choose, it must be simple and clear. The second is the check box below the text editor. If we define that this question allows more than one valid answer, then it is necessary to mark the check box, and if the question admits only one valid answer, then leave this box unchecked.
After entering the text of the question, click "Create" at the end of the form.You have created the first question in our survey, now we only need to add possible answers to this question.
After creating a new question the system will redirect you to a screen where you can define the possible answers (Figure 7). The new screen has a title on the top indicating for which question you are defining the responses, followed by buttons: "Create a new answer"and "Return to the list of questions".
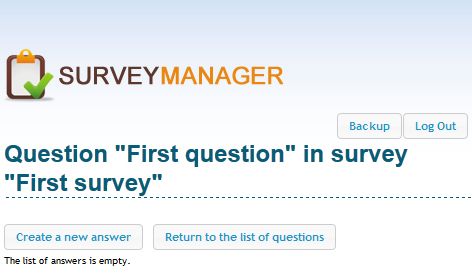
Figure 7. List of answers empty.
Press "Create a new answer". The form for creating a new response is similar to the form to enter the description of the survey (Figure 8)
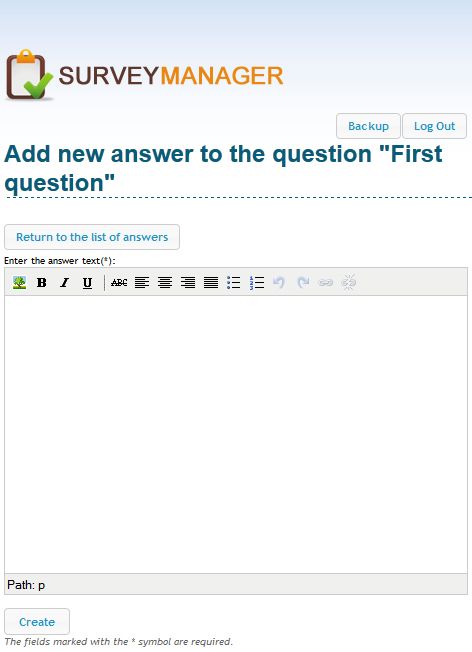
Figure 8. Create answer screen.
Once you created the first answer to our question, the system will return to the previous screen, this time with a list of answers added to the question (Figure 9).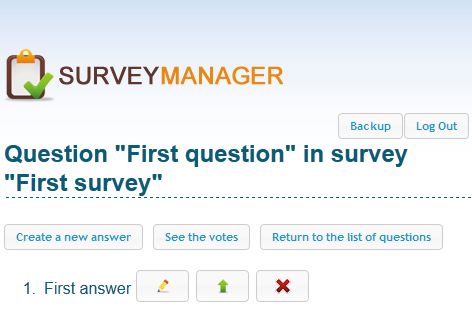
Figure 9. List of answers.
Each possible answer is associated with three buttons, the first (![]() )allows us to edit the text of the response. The second button (
)allows us to edit the text of the response. The second button ( ![]() ) allows to reorder the list of responses and the last (
) allows to reorder the list of responses and the last (![]() ) button to delete the answer.
) button to delete the answer.
If you look at the top of the screen, there is a new button named "See the votes", which will display the answers that users chose for this question (Later we will focus on how to view and analyze the responses of users).
After defining all the possible answers to our first question, press the button "Return to the list of questions", which brings us back to the screen with a list of questions pertaining to the survey (Figure 10). We now have in the centre a list of the questions, each of these questions is associated with three buttons to edit the text of the question, rearrange the list of questions and a third button to delete (Be extremely careful when deleting a question, because all responses associated with it, would be eliminated too).
Figure 10. List of questions.
If you wish to modify the list of responses associated to a question, simply click on the name of the question, which brings you to the list of possible answers to that question.
In the same way as with the answer options, once the survey has a question defined, a new button appears, named "See the votes" that will analyze the responses that the users selected, but this time with respect to all the questions in the survey.
Once all the survey questions are entered, press "Return to the list of surveys".
Congratulations! You have created your first survey - now you just need to publish it on your website.
Publication of a survey
The second step is bringing the survey to your website users.
To publish the survey on a website, you must first log in to the system, and go to the page with the list of surveys (Figure 3); on this page, in the centre, you can see the list of previously created surveys and a set of associated actions: Post survey (![]() ), Edit description of the survey (
), Edit description of the survey (![]() ) and Delete survey (
) and Delete survey (![]() ) (Deleting a survey will eliminate the questions associated with their respective responses and votes from users). If you wish to modify the survey questions you just have to click on the name of the survey.
) (Deleting a survey will eliminate the questions associated with their respective responses and votes from users). If you wish to modify the survey questions you just have to click on the name of the survey.
When you press Post Survey, you will be directed to a new screen (Figure 11) with two main sections, the list of themes that can be used with the survey: initially there are three visual themes (Accordion, List, and Wizard) and a text box. By selecting any of the visual themes that you wish to apply to the survey, the code in the box will vary accordingly.
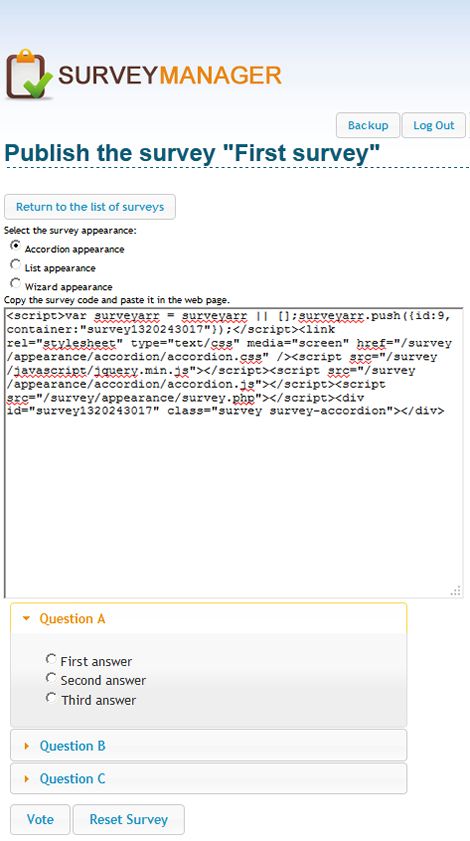
Figure 11. Publishing a survey
To publish the survey on your website simply copy the generated code in the text box and paste into the body of the webpage where you want to show the survey (to edit the web page you can use the web editor of your choice) and that’s all, the survey has been published on its website!
Users can visit their website and answer the survey.
Now, to check the answers to the survey follow the instructions in the next section.
Survey results
With the Survey Manager it is possible to analyze the responses to a survey or focus only on the responses received by one of the survey questions.
To prevent users from tampering with the survey results, the responses are restricted by the IP number from which the survey is filled, a user can only respond once to a survey from the same IP.
To review the survey responses, log in to the Survey Manager and select the survey you want to check, press on the button that you will see in the upper section of the screen with the list of questions, "See the votes". The system will direct you to a new screen (Figure 12) with three main sections: the upper left section shows a summary of the total survey responses received and the date of the last response received, followed by a breakdown of the number of responses received for each of the questions and answers.
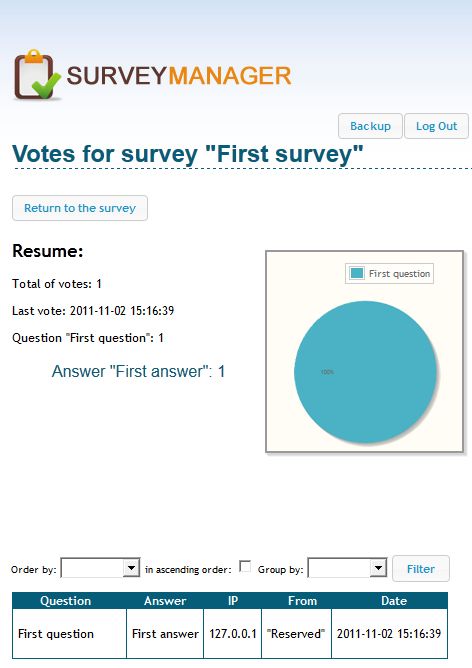
Figure 12. Stats screen.
In the upper right section the system generates a pie chart with the responses received by each of the questions (This diagram can quickly show which questions are more difficult for users).
In the middle section you will see the responses received in the survey. For each question, the system will store the answers, the IP of the user, the country, and the date.
Responses can be sorted or grouped by any of the fields. A form above the results allows to do that.
If you wish to analyze the responses received by a specific question, by clicking the "See the votes" on the screen where there is a list of responses to the question at issue.Surveys’ backup
The "backup" button is on the top right, next to the "Log out" button, pressing this button you back upthe database structure and data in SQL standard. The backup file can be stored in the location of your choice.
Another way of acquiring and installing "Survey Manager"
Survey manager is also distributed as an extension for Adobe Dreamweaver (Dreamweaver MX or higher). Use the Dreamweaver Extension Manager for easy installation on site.
To install the extension follow these steps:
Open the Adobe Dreamweaver and press the menu: "Help / Manage extensions ...." This option runs the Adobe Extension Manager associated with your version of Adobe Dreamweaver.
In the Adobe Extension Manager menu, press option "File / Install Extension" and enter the file location surveymanager.mxp.
After installing the extension, please restart Adobe Dreamweaver.
Now the extension is installed and ready for use. To publish "Survey Manager" on your website from Dreamweaver just to press the menu button "Commands / Insert Survey Manager", this action creates a folder named "Survey" n the folder structure of your website, and this folder must be published onto your server.
Instant Download
$19.99
Paypal: You will return from Paypal to a direct download page. A copy of your personal donwload link will be sent to the email address used for payment.
Be sure to check also your spam/bulk mail folder.